Mateoja Farm Trail Hike

Yesterday we went on an awesome hike and we learned a lot! Claudia, our First Nations support worker, took us to the forest to learn more about native plants on our island.

We decided to do a little math on the way and used a hip chain to measure the distance to the trail. Justin wore the hip chain. A thin thread fed out of it as we walked and counted each meter. We estimated the distance and time as we walked. It was 1112 meters from our school to the entrance of the trail. It took us about 14 minutes to walk that distance.

In the forest we saw many different types of trees (cedar, hemlock, fir, alder, and pine). Claudia taught us how to tell them apart by looking at their bark and needles and by looking at the top of the tree. We also saw many other plants that the First Nations people used (salal, huckleberries, ferns, and labrador tea).  We are going to use some of the Labrador tea leaves to make our own tea next week.

Here are some of the cool things we learned:
Dante-We learned how to tell what type of tree it is by looking at the bark. Moss often grows on the north side of trees.
Justin-We learned that we can make tea out of a leaf that we found.
Sophie-We learned that a hemlock tree always has its tip bent over.
Silkence-We found a nursery log. It is called a nursery log because it has other plants growing on it.
Niall-Trees can stand even if they have been burnt quite a bit. Pine tree needles are extremely spiky.
Fay-The cedar bark looks like straight lines going down. Alder leaves are light green.
Karin-We found a huge tree that was burnt on the side a little. Sometimes salal leaves are huge!
Ana-Claudia told us that the forest had a big fire many, many, years ago.
Jenny-The nursery log had moss, salal, huckleberries, and a little hemlock growing on it.
Sahara-We found tree fungus that was growing up high on the trees.
Oceana-We found a tree that had lots of little broken branches all around it.
Kennedy-We found a tree that had a parasite that made the branches look funny and it takes energy from the tree.
Lily-When we went on the trial we found a flower that looked like a dogwood flower.

What kinds of trees do you have in your forests?

Have you ever tried Labrador tea?

A Closer Look

We continued our study of plants today by dissecting seeds. Almost half the class was away today and so this post is a way to share our discoveries with our friends who were sick.

First we completed an anticipation guide full of interesting statements about  seeds.  We had to decide if the statements were true or false.  Try a few for yourself (you can find the answers at the bottom of this post):

T  F       1.  All plants produce seeds.

T  F       2.  The outside covering is called the seed coat.

T  F       3.  Some seeds can wait two thousand years before they begin to grow.

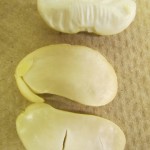
Next, we made observations after looking carefully at dried lima beans and ones that had been soaked over night.  We compared the two and tried to predict what the inside of the seed would look like.

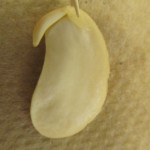
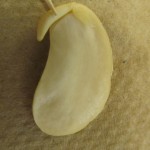
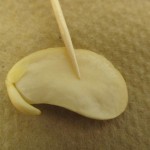
Finally, we carefully dissected the seeds identifying the different parts and discussing their jobs.


Here are a few of the cool facts we learned today:

Jenny-If the seed coat doesn’t break the plant won’t grow. Some plants grow very quick. The seed needs its food supply.
Fay-The seed coat won’t break unless the seed gets enough water to expand and break out. Some seeds can wait up to 2000 years before they begin to grow. The seed needs water and the right temperature to grow.
Silkence-
The seed has a coat so that it will be protected from disease and insects. There is an embryo inside the seed. The embryo looks like a big pokey thing.
Ana-A seed needs to have water and if it doesn’t it won’t grow.
Dante-The food supply is almost the whole lima bean.
Justin-It needs the right temperature in the ground to grow.
Niall-Seeds have their own food supply until they can make their own food.
Jordan-The lima bean has all the food it will need until it can grow and then it will make its own food. The temperature has to be right for the plant to grow or it will die. Plants can grow very, very slow. The lima bean has a little curve at the top of it and you can see the root growing.
Quang-The lima bean had a lunch pack just like the baby salmon did so it can grow.
Oceana-If you put a lima bean in water overnight it will expand.

How did you do with your predictions?

(Questions 1,2, and 3 are all true)

Have you ever looked closely at the inside of a seed?

If you would like to read more about the seed that waited 2000 years to grow, click here.

Leaves, Leaves, Everywhere!

This week we have been learning all about leaves. Today we went outside and searched our school grounds to find different types of leaves. We brought our finds back to the classroom and made leaf rubbings to add to our science duotangs. We labeled our rubbings with the leaf type (simple of compound), the blade shape, and the type of edge. Some of the leaves were pretty tricky to classify!

See if you can identify some of the different leaf shapes (e.g. oblong, oval, lance, spatula, diamond) and edges (e.g. lobed, scalloped, toothed, serrated) that we found in these pictures.

Up Close with Flowers

We started the morning off by dissecting flowers. We looked for all the different parts and tried to figure out what each part was for.   Here are some of the interesting things we discovered:

Kennedy-When we took the petals off we could see the stamen
Niall-Inside the stem looked hollow
Lily-Inside of the stem there were little veins for transport
Sahara-We looked inside the stem and it was really gooey
Justin-We used magnifying glasses to have a closer look
Karin-We eventually cut the whole flower off to see the eggs
Ana-There were many, many, eggs
Jenny-The colourful petals attract the bees
Oceana-When you rub your fingers on the anther you get pollen on your fingers
Silkence-The stigma on top of the pistol felt sticky so the pollen from the bees will get stuck

Dante-I learned all the parts of the flower


You can take a closer look with us by watching our slide show.

Dissecting flowers was the perfect introduction to a Georgia O’Keeffe inspired art lesson. Mrs. Watson brought in beautiful flowers for us to use as our inspiration. We hope you like them!

Native Plants

Today, during our First Nations time, Claudia taught us about some of the native plants that can be found in our schoolyard. We compared different evergreen trees, berry bushes, and other plants the First Nations people used. We talked about the different ways the plants were used and then we had a special treat. Claudia peeled salmonberry shoots and let us all have a taste. It was a new experience for everyone! Some students really liked the shoots and some found them to be too bitter. After our snack we started our plant identification booklets and were excited to find out that we will get to learn some Kwak’wala too!

Have you ever tried salmonberry shoots before? If you have did you like the taste?

Plants

In our new science unit we will be learning all about plants. To get started we got into groups and brainstormed everything we already knew. Then we got together and put all of our ideas into a web. We made categories to help us keep everything organized. We sure know a lot already!

Do you have a favourite plant fact you can share with us?

Calling All Tomatonauts!

We are very excited to be participating in Tomatosphere 2010. The students will be planting some very special tomato seeds this week!

Tomatosphere is a Canadian-based research project involving more than 12,000 classrooms of students (“Tomatonauts”) across Canada and the United States. The project enables students to make a contribution to a real science experiment involving research related to the development of seeds with a high germination rate for prolonged space travel.

Students will work with two packages of seeds – a control group and a group of seeds that were taken into space to the International Space Station aboard Space Shuttle Endeavour. The seeds spent two months on the Station before returning to Earth in late September 2009.

The students will observe:
• The time required for each seed to successfully germinate.
• The percent of successful germination in each group.
• The seedling vigour as determined by height measurements.
• How similar seedling vigour is in each group.

Check out the Tomatosphere website here  http://www.tomatosphere.org